Microcontrollers: Under the Hood
How a Processor Core Works
Table of Contents
- Why Design a Processor?
- What are FPGAs?
- Processor as a State Machine
- The Core Instruction Cycle
- Beneath Assembly: Microcode
- A Language for Hardware: RTL
- Conditional Operations in RTL
- Modern Processor Design Flow
- Speeding Things Up: Caching
- Doing More with Multi-Core
- From C++ to Assembly
- Code Example: Variables
- Code Example: A `for` loop
- Summary and Next Steps
Why Design a Processor?
- As an embedded engineer, you might need to design a "soft processor" for specialized tasks.
- This is done using programmable hardware like Field Programmable Gate Array FPGAs.
- Use Case: You need extra computing power for a specific, fast operation, but a more powerful microcontroller is too expensive or doesn't exist.
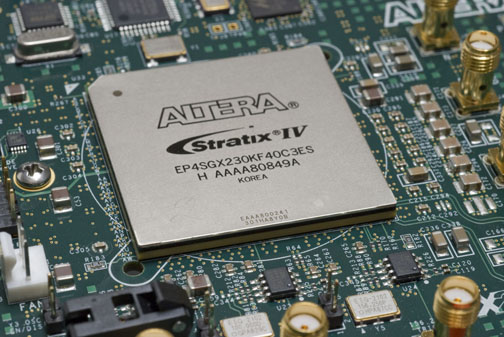
What are FPGAs?
Field Programmable Gate Array (FPGA): A chip containing a "sea of gates" - a matrix of configurable logic blocks.
- You write software that describes how to connect these blocks (AND gates, OR gates, flip-flops).
- This allows you to create custom hardware circuits without fabricating a new chip.
Processor as a State Machine
A processor is essentially a state machine that processes instructions sequentially.
Analogy: Following a Recipe
- Each step in the recipe is an instruction (e.g., "Add 1 cup of flour," "Stir until combined").
- The chef is the processor, reading and executing each step sequentially.
- This demonstrates the basic concept of a program: a sequence of instructions to achieve a final result.

The Core Instruction Cycle
At its heart, a processor continuously performs a cycle of four main steps to execute a program:
- Fetch: Gets the next instruction from memory at the address indicated by the Program Counter.
- Decode: The internal logic determines what the instruction means and what actions are needed.
- Execute: The Arithmetic Logic Unit (ALU) performs the actual operation (e.g., addition, moving data).
- Write Back: The result of the execution is stored back into a register or memory (optional step).
Beneath Assembly: Microcode
A single assembly language instruction (like ADD or MOVE) is not the lowest level.
- Each assembly instruction is actually made up of a sequence of even smaller instructions called a microprogram.
- These "micro-instructions" are very basic, controlling individual signals: "turn on a bus," "pulse a clock," "latch data into a register."
- This microprogram is executed by a special piece of hardware called a micro-sequencer, often using a ROM inside the CPU.
A Language for Hardware: RTL
How do we describe these low-level micro-operations before building the hardware?
Register Transfer Logic (RTL) is a high-level notation used by engineers to describe the flow of data between registers in a digital system.
- It's an abstraction used to design and document the architecture of a CPU.
- Example:
R2 ← R1describes moving the contents of Register 1 to Register 2.
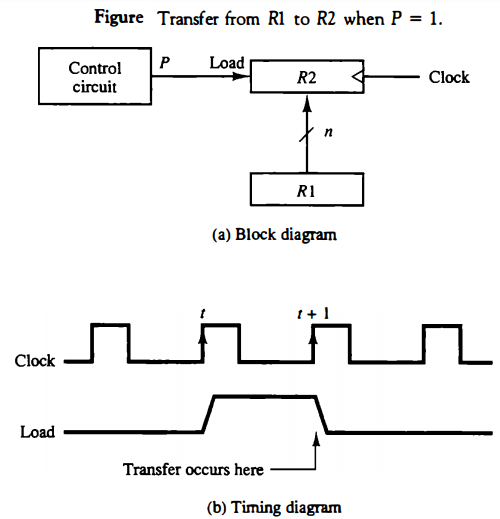
Conditional Operations in RTL
RTL can also describe conditional operations, which translate directly to control logic in hardware.
Example:
If (LD = 1) then RM ← RN
- This means: "If the 'Load' signal (LD) is active (1), then copy the data from register RN to register RM."
- In hardware, the LD signal would act as an enable gate for the clock signal going to register RM. The transfer only happens when both the clock pulses and LD is high.
Modern Processor Design Flow
Today, processors are not typically designed by manually wiring gates. A more automated flow is used:
- Hardware Description Language (HDL): Engineers describe the processor's behavior using a language like Verilog or VHDL, which looks similar to C.
- Synthesis: A compiler-like tool called a synthesizer converts the HDL code into a lower-level description, similar to RTL and gate-level logic.
- Place & Route: The tool then figures out how to implement this logic using the physical resources of a target chip (like an FPGA).
This allows for the design of incredibly complex processors.
Speeding Things Up: Caching
Modern processors use a cache to improve performance.
- A cache is a small, extremely fast local memory inside the CPU.
- It stores frequently accessed instructions and data.
- Benefit: When running code in a loop, the CPU can fetch from the fast cache instead of the slower main memory.
- Caveat: Can lead to "cache misses" or stale data if not managed properly.

Doing More with Multi-Core
As we approach the physical limits of clock speed, the industry has shifted to parallel processing.
- Multi-core processors contain two or more identical processing units (cores) on a single chip.
- This allows the system to execute multiple tasks simultaneously.
- Common in CPUs and GPUs, and now appearing in more advanced microcontrollers.
- Examples: ARM Cortex-M processors with multiple cores, Parallax Propeller chip.
From C++ to Assembly
How does the C++ code we write relate to these low-level processor instructions?
- A compiler translates our high-level C++ code into low-level assembly language specific to the target processor (e.g., AVR, ARM, x86).
- An assembler then converts the assembly code into the final binary machine code (1s and 0s) that the processor executes.
- Tools like the Godbolt Compiler Explorer let us see this translation in real-time. Check out Godbolt.org

Code Example: Variables
The compiler treats variables differently based on their scope.
Local Variables (inside a function):
- Created on the stack when the function is called.
- Accessed relative to a stack or base pointer.
- Destroyed when the function returns.
Global Variables (outside all functions):
- Stored in a fixed memory location in the data segment.
- Accessed via a direct memory address.
- Persist for the entire life of the program.
Code Example: A `for` loop
A simple C++ for loop translates into several key assembly instructions:
#include

int main() {
    // Basic for loop
    for (int i = 1; i <= 10; i++) {
        // do something
    }

    return 0;
}
Assembly equivalent:
- Initialization: Set a register or stack location to 0.
- Compare: Compare the value with 10.
- Conditional Jump: If the value is less than 10, jump to the loop body. If not, exit the loop.
- Increment: Add 1 to the register/memory.
- Jump: Jump back to the comparison step.

Summary and Next Steps
- Processors are complex state machines that execute simple instructions in a cycle (Fetch, Decode, Execute).
- Assembly instructions are built from even lower-level micro-instructions.
- RTL and HDLs are used to describe and design this hardware.
- Features like caching and multi-core architectures are used to improve performance.
- High-level code (C++) is compiled down to the assembly language that the processor understands.
Next Lecture: We will dive deeper into C++ programming and its relationship with microcontroller hardware.
Diving Deeper into Arduino & Microcontrollers
A Technical Overview
Overview
- The Arduino Philosophy: Unpacking the question, "What exactly is an Arduino?"
- Technical Deep Dive: Exploring the Arduino from a technical point of view by looking at its official website and documentation.
- Reading the Datasheet: Understanding the brain of the Arduino, the ATmega328P microcontroller.
- On the Bench: A physical look at a variety of real-world microprocessors and microcontrollers.
A Brief History of Arduino
- Created around 2005; its success was a mix of timing, simplicity, and luck.
- It wasn't the first of its kind; predecessors like the Parallax Basic Stamp existed.
- The name "Arduino" comes from a bar in Ivrea, Italy, where founders used to meet.
- A trademark dispute around 2008 led to a temporary split (arduino.cc vs arduino.org), which was later resolved, unifying the project.
The "Arduino-ness": A Three-Part Ecosystem
Arduino is not just one thing; it's a combination of three key components that work together:
- The Hardware: A family of open-source microcontroller development boards.
- The Software (IDE): An easy-to-use Integrated Development Environment for writing, compiling, and uploading code.
- The Library (API): A standardized, simplified set of C++ functions that makes programming consistent and portable across different Arduino boards.
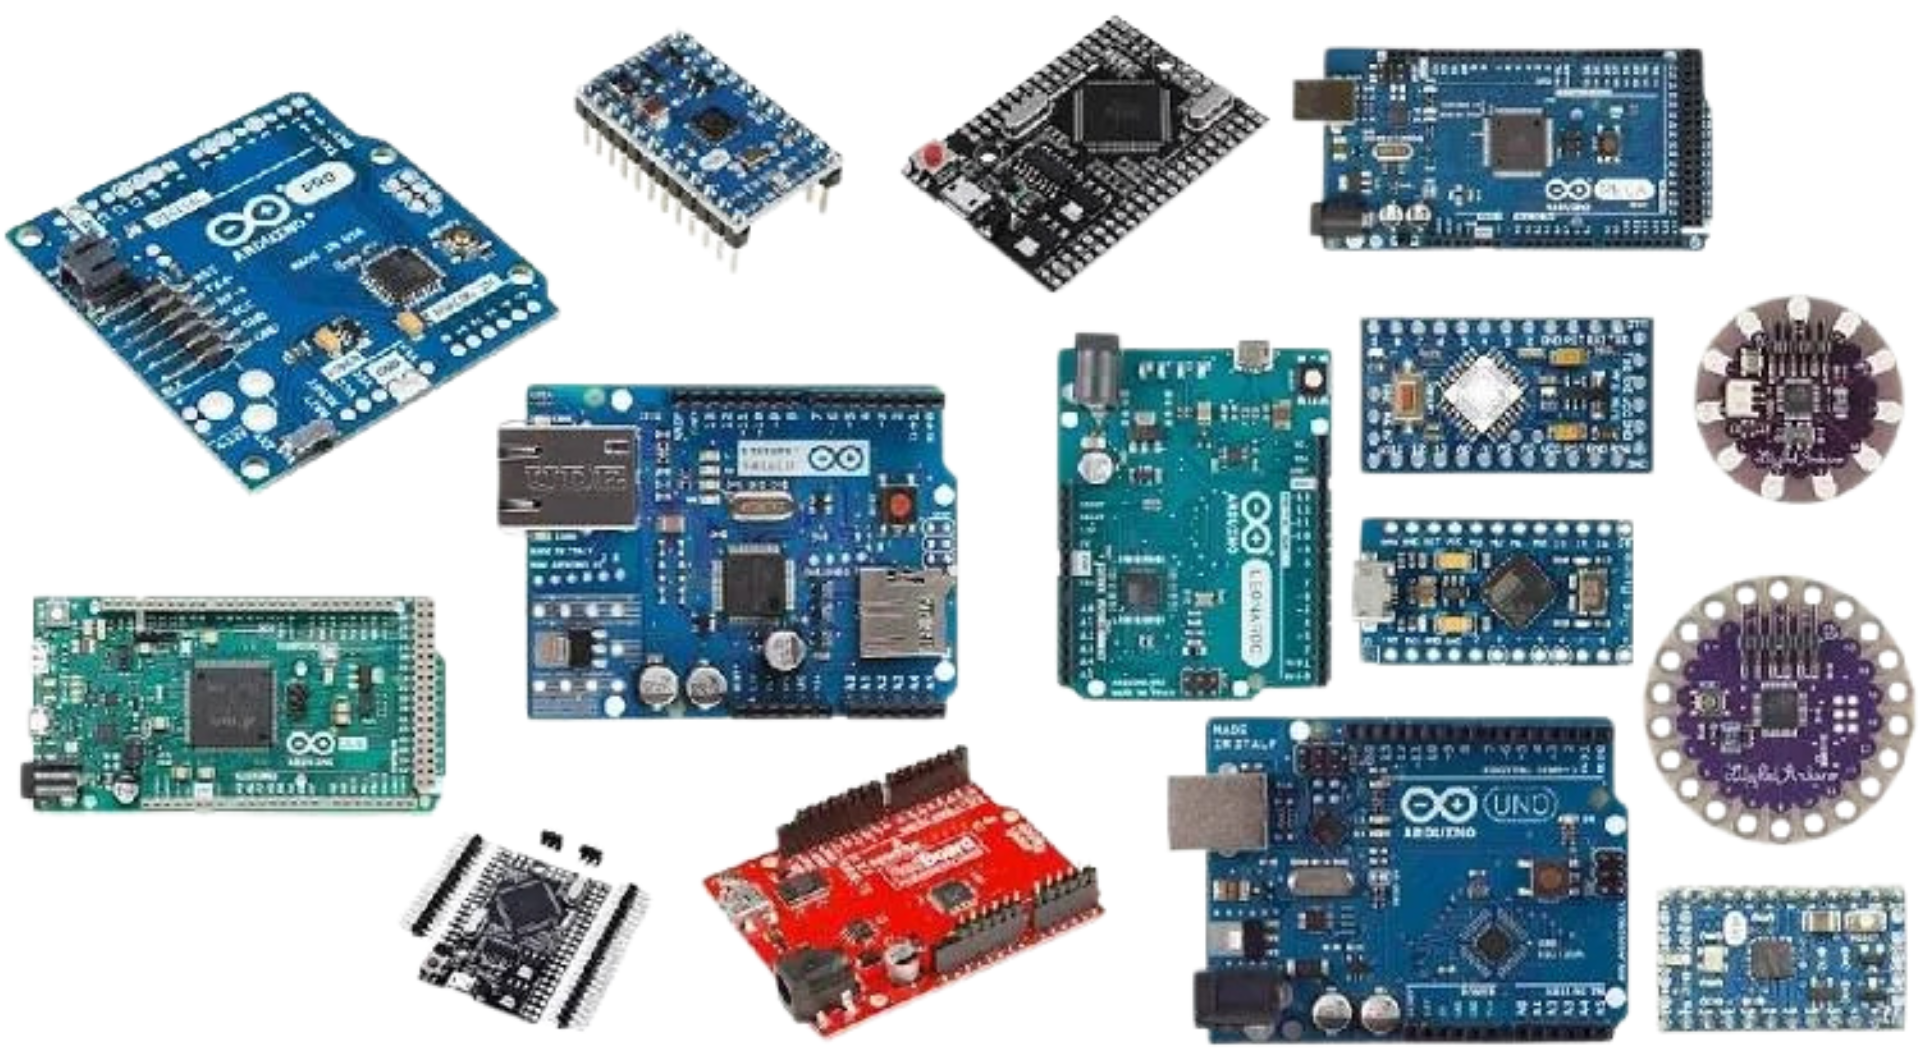
Part 1: The Hardware
- Arduino is a family of development boards, not a single processor.
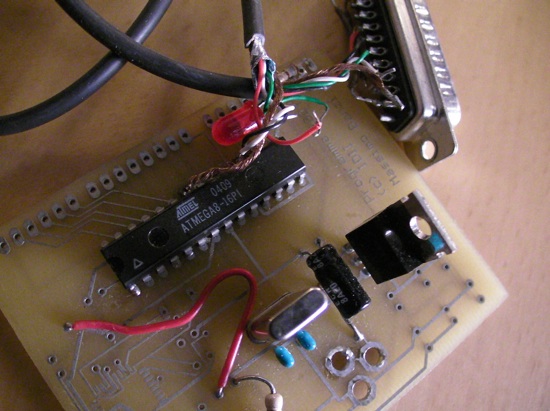
- The classic Arduino Uno uses an 8-bit Atmel ATmega328P microcontroller.
- Other boards use different, more powerful processors like 32-bit ARM Cortex or ESP32 chips.
- The hardware has evolved, with many different versions and form factors created over the years for various applications (IoT, Education, etc.).
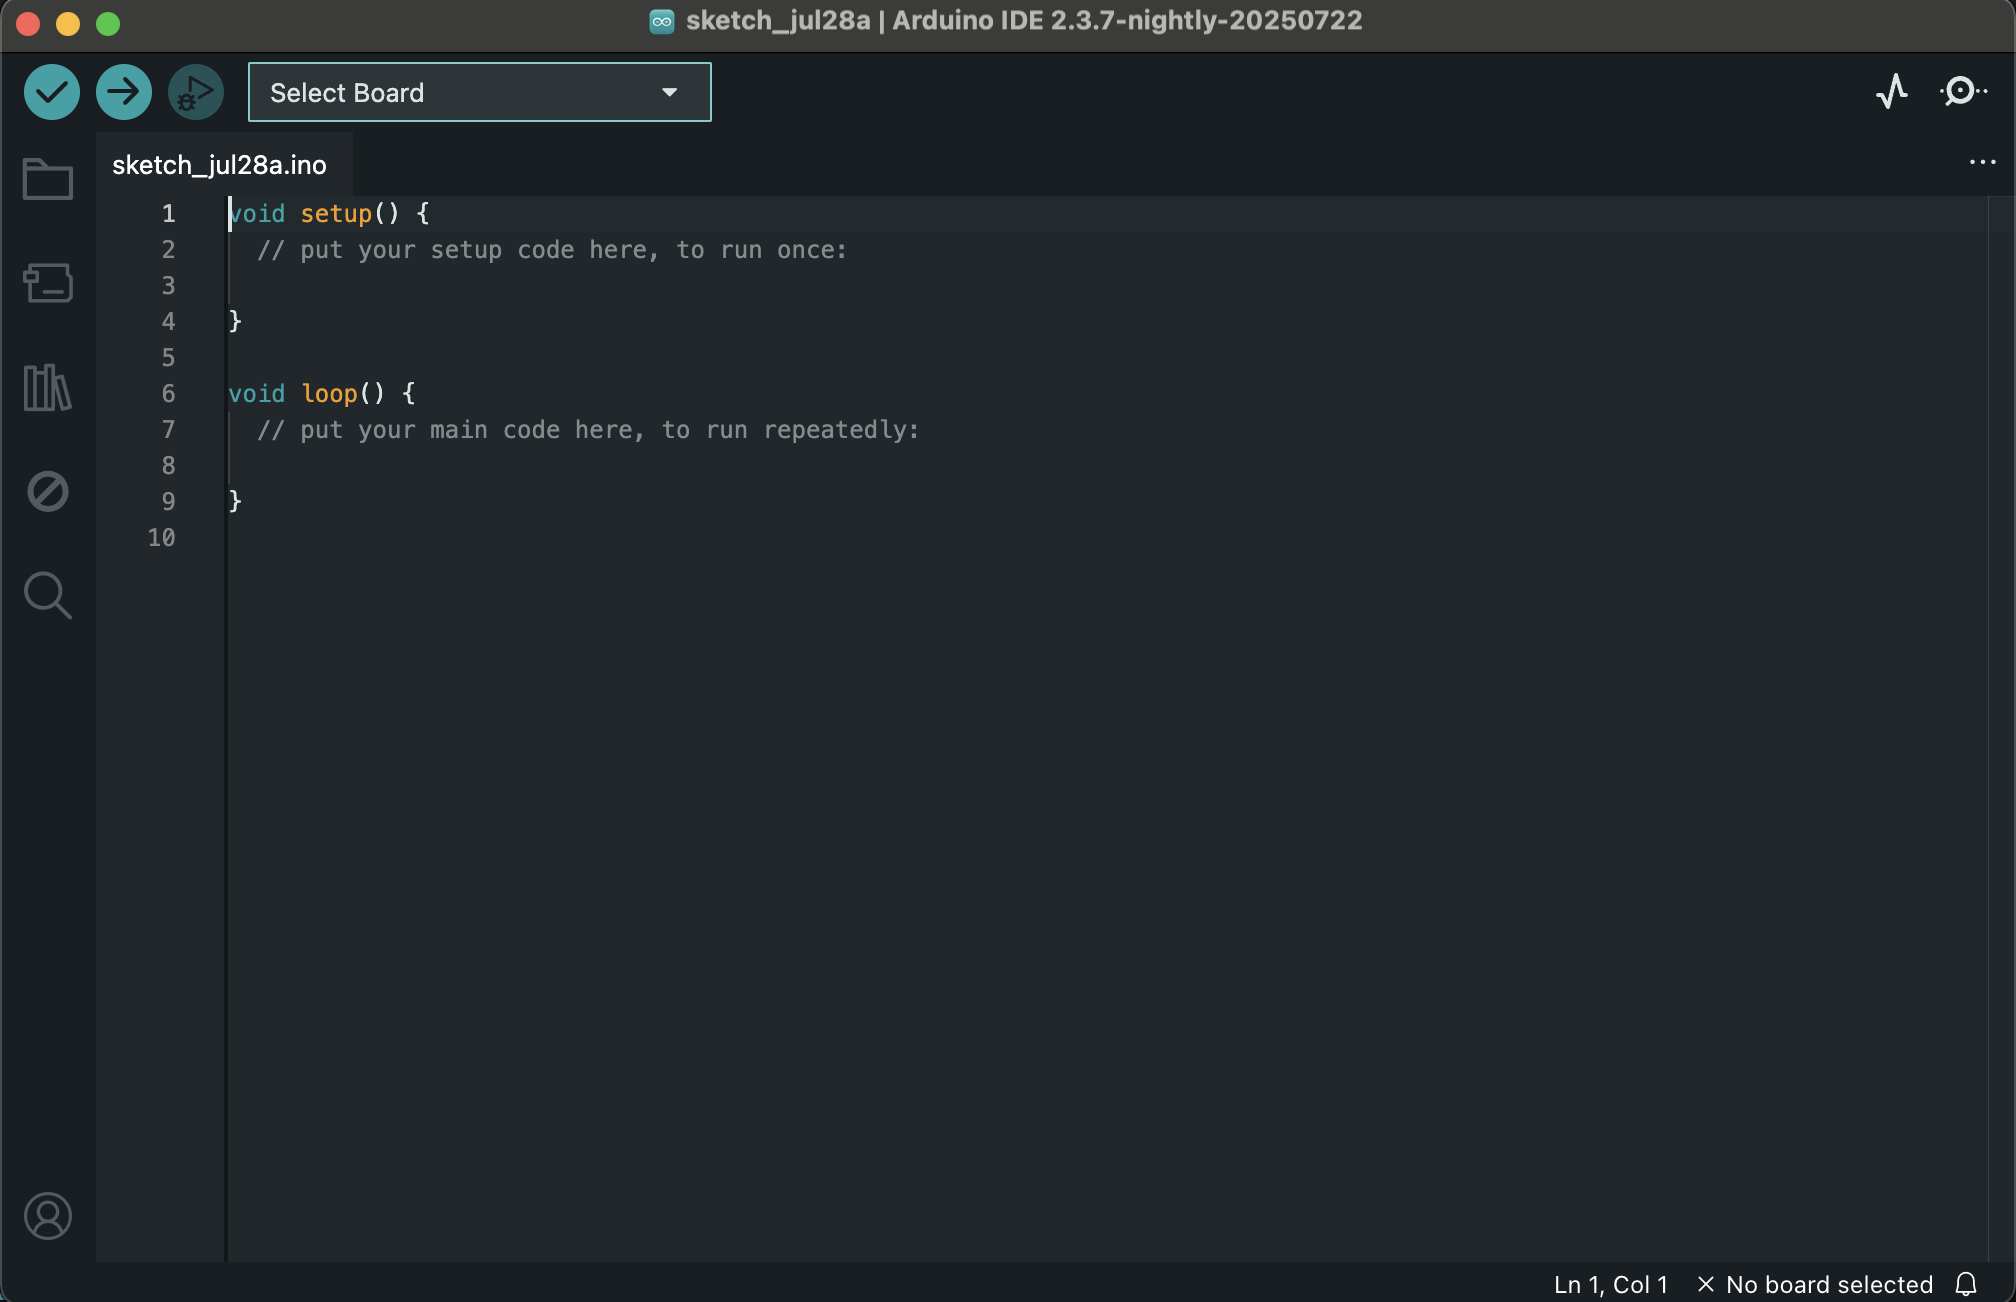
Part 2: The Software (IDE)
- The Arduino IDE (Integrated Development Environment) simplifies embedded programming.
- It bundles a text editor, a C++ compiler (GNU), and a download tool.
- It hides the complexity of setting up a toolchain, making it accessible for beginners on Windows, Mac, or Linux.
- With one click, you can compile your code (called a "sketch") and upload it to the board via USB.
Part 3: The Library (API)
- The core of Arduino's ease-of-use is its simple, standardized Application Programming Interface (API).
- Functions like
pinMode(),digitalWrite(), anddelay()are not part of standard C++, but are provided by the Arduino library. - This API provides a layer of abstraction, so the same basic code can run on different Arduino boards, even with different underlying processors.
- This consistency makes it easy to share code and create community-driven libraries.
Example "Blink" Sketch:
void setup() {
  pinMode(LED_BUILTIN, OUTPUT);
}

void loop() {
  digitalWrite(LED_BUILTIN, HIGH);
  delay(1000);
  digitalWrite(LED_BUILTIN, LOW);
  delay(1000);
}
Your Most Important Tool: Research
Becoming a good embedded engineer is about learning how to find information yourself.
- Start with the Source: Before asking a question on a forum, always check the official documentation on the Arduino website or search on Google/YouTube.
- Read the Docs: People have spent thousands of hours creating excellent documentation. Use it!
- Ask Specific Questions: If you are stuck, forums are a great resource. However, ask specific questions about a library or function you're struggling with, not broad questions that are answered in the "Getting Started" guides.
- Warning on Community Code: Be aware that many user-created libraries can be inefficient, buggy, or poorly written. They are a great starting point, but don't assume they are perfectly optimized.
Navigating Arduino.cc
The official website is your central hub for all things Arduino. Get comfortable with its key sections:
- Hardware: Browse all official boards, categorized by features (Entry Level, IoT, etc.) and view retired products.
- Software: Download the latest IDE (1.8.x or the newer 2.0), and find the Web Editor.
- Documentation: The most critical section. Contains:
- Getting Started Guides
- Language Reference (details on every API function)
- Built-in Examples
- Library Documentation
- Community: Access forums and Discord to connect with other users.
Datasheets Part 1: The Board Pinout
- Each Arduino board has a documentation page with crucial information.
- The pinout diagram is one of the most useful resources.
- It shows what each pin on the board does, including power, ground, digital I/O, analog inputs, and special functions (like I2C or SPI).
- Pro Tip: Print out the pinout diagram for the board you are working with and keep it on your desk for quick reference.
Datasheets Part 2: The Microcontroller
- The Arduino board datasheet is a high-level summary. For deep details, you need the datasheet for the microcontroller chip itself.
- For the Arduino Uno, this is the ATmega328P datasheet.
- This document is far more extensive (~300 pages) and describes the chip's internal architecture.
- It covers everything: memory maps, registers, instruction timings, clock systems, interrupt handling, and details for every peripheral (timers, ADC, etc.).
Why Read a 300-Page Datasheet?
While the Arduino API insulates you from this complexity, true mastery comes from understanding what's "under the hood."
- Gain Expert Knowledge: Reading the datasheet is how you learn the true capabilities and limitations of the hardware.
- Optimize Performance: When you need code to be faster, smaller, or more efficient, you must bypass the simple API and control the hardware registers directly.
- Debug Complex Problems: Understanding the hardware is essential for troubleshooting difficult issues.
- Become the Best: To be a top-tier embedded engineer, you must do the work of reading the documentation. This is what separates novices from experts.
On the Bench: Historical Processors
A physical look at some of the giants of computing history:
- MOS 6502: The brain of the Apple II, Commodore 64, and Atari 2600.
- Zilog Z80: Powered the TRS-80 and countless classic arcade games.
- Motorola 68000: A powerful 16/32-bit processor that drove the original Apple Macintosh, Amiga, and Atari ST.
- Package Types: We see different physical forms, like the common DIP (Dual In-line Package) and the more dense PGA (Pin Grid Array).
On the Bench: Modern Microcontrollers
Microcontrollers integrate a CPU with memory and peripherals onto a single chip. They come in all shapes and sizes.
- ATmega Family: The 168 (early Arduinos) and 328P (modern Uno) are popular 8-bit MCUs.
- Microchip PIC: A huge family of MCUs, from tiny 8-pin chips (like the PIC12) to powerful 16-bit versions (PIC24).
- Parallax Propeller: A unique multi-core MCU with eight independent processing cores.
- These are the tiny brains inside countless everyday devices, from toys to appliances.
Summary & Next Steps
- Arduino is an Ecosystem: It's a combination of hardware boards, a software IDE, and a standard library/API.
- Documentation is Key: Learning to navigate the Arduino website and read datasheets (both for the board and the chip) is a critical skill.
- Hardware Comes in Many Forms: We've seen the physical evolution from classic microprocessors to modern, single-chip microcontrollers.
- Practice: Start experimenting with your virtual Arduino board, click here to start the lab..